(→Siege Camps: Added the line of forcing enemies to miss an objective.) Tag: Visual edit |
No edit summary |
||
| (21 intermediate revisions by 7 users not shown) | |||
| Line 1: | Line 1: | ||
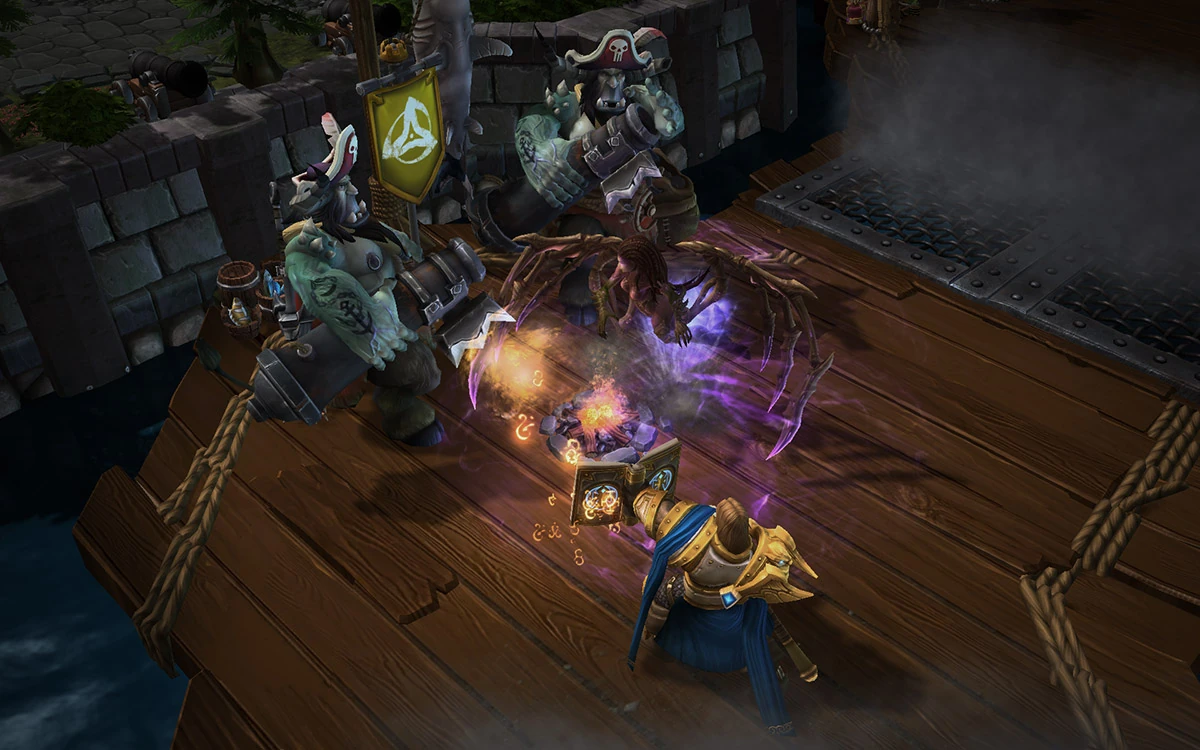
| − | [[File:The-natives-are-restless.jpg|right|thumb|[[Kerrigan]] and [[Uther]] attack a |
+ | [[File:The-natives-are-restless.jpg|right|thumb|[[Kerrigan]] and [[Uther]] attack a Mercenary camp.]] |
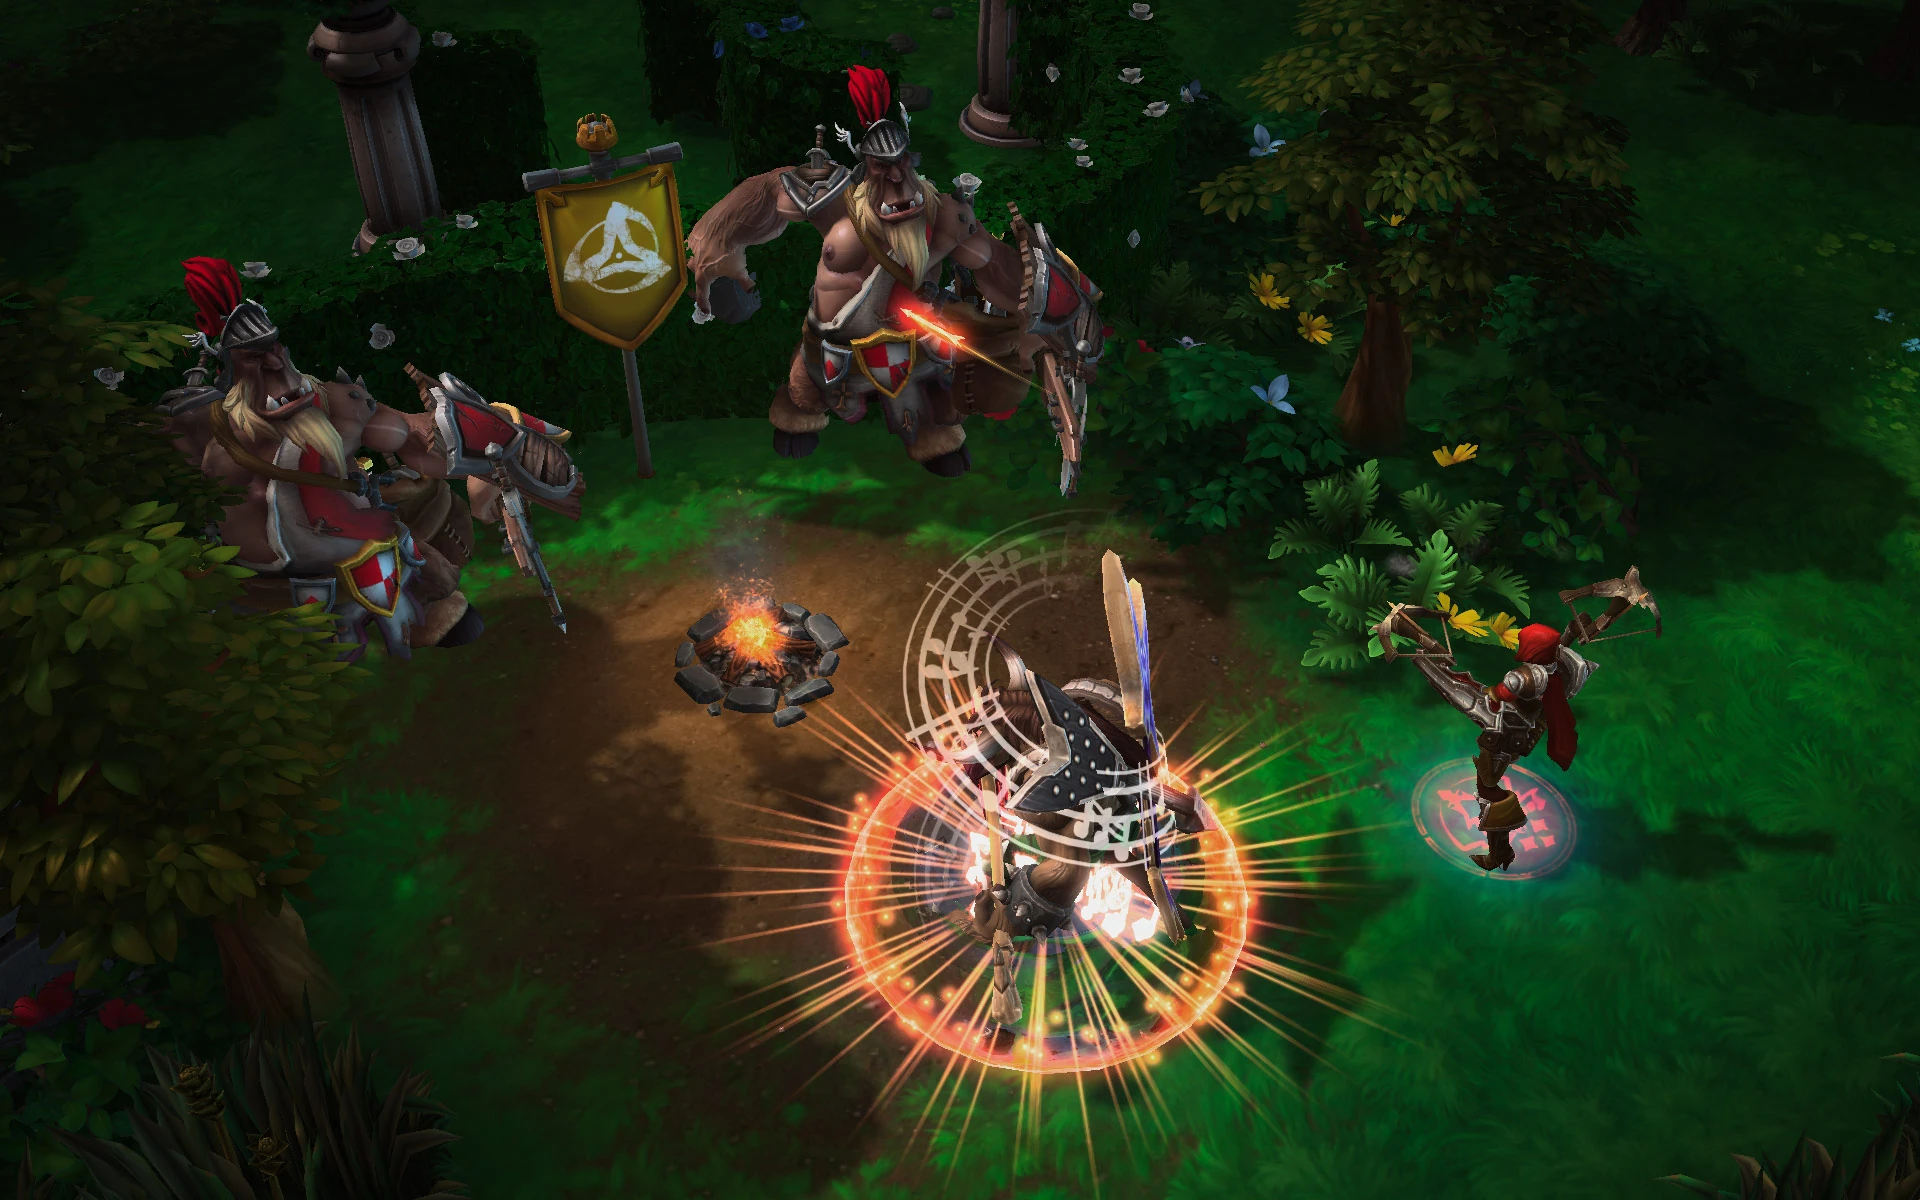
[[File:Heroes-11.jpg|thumb|[[ETC]] and [[Valla]] attempt to enlist a pair of siege giants.]] |
[[File:Heroes-11.jpg|thumb|[[ETC]] and [[Valla]] attempt to enlist a pair of siege giants.]] |
||
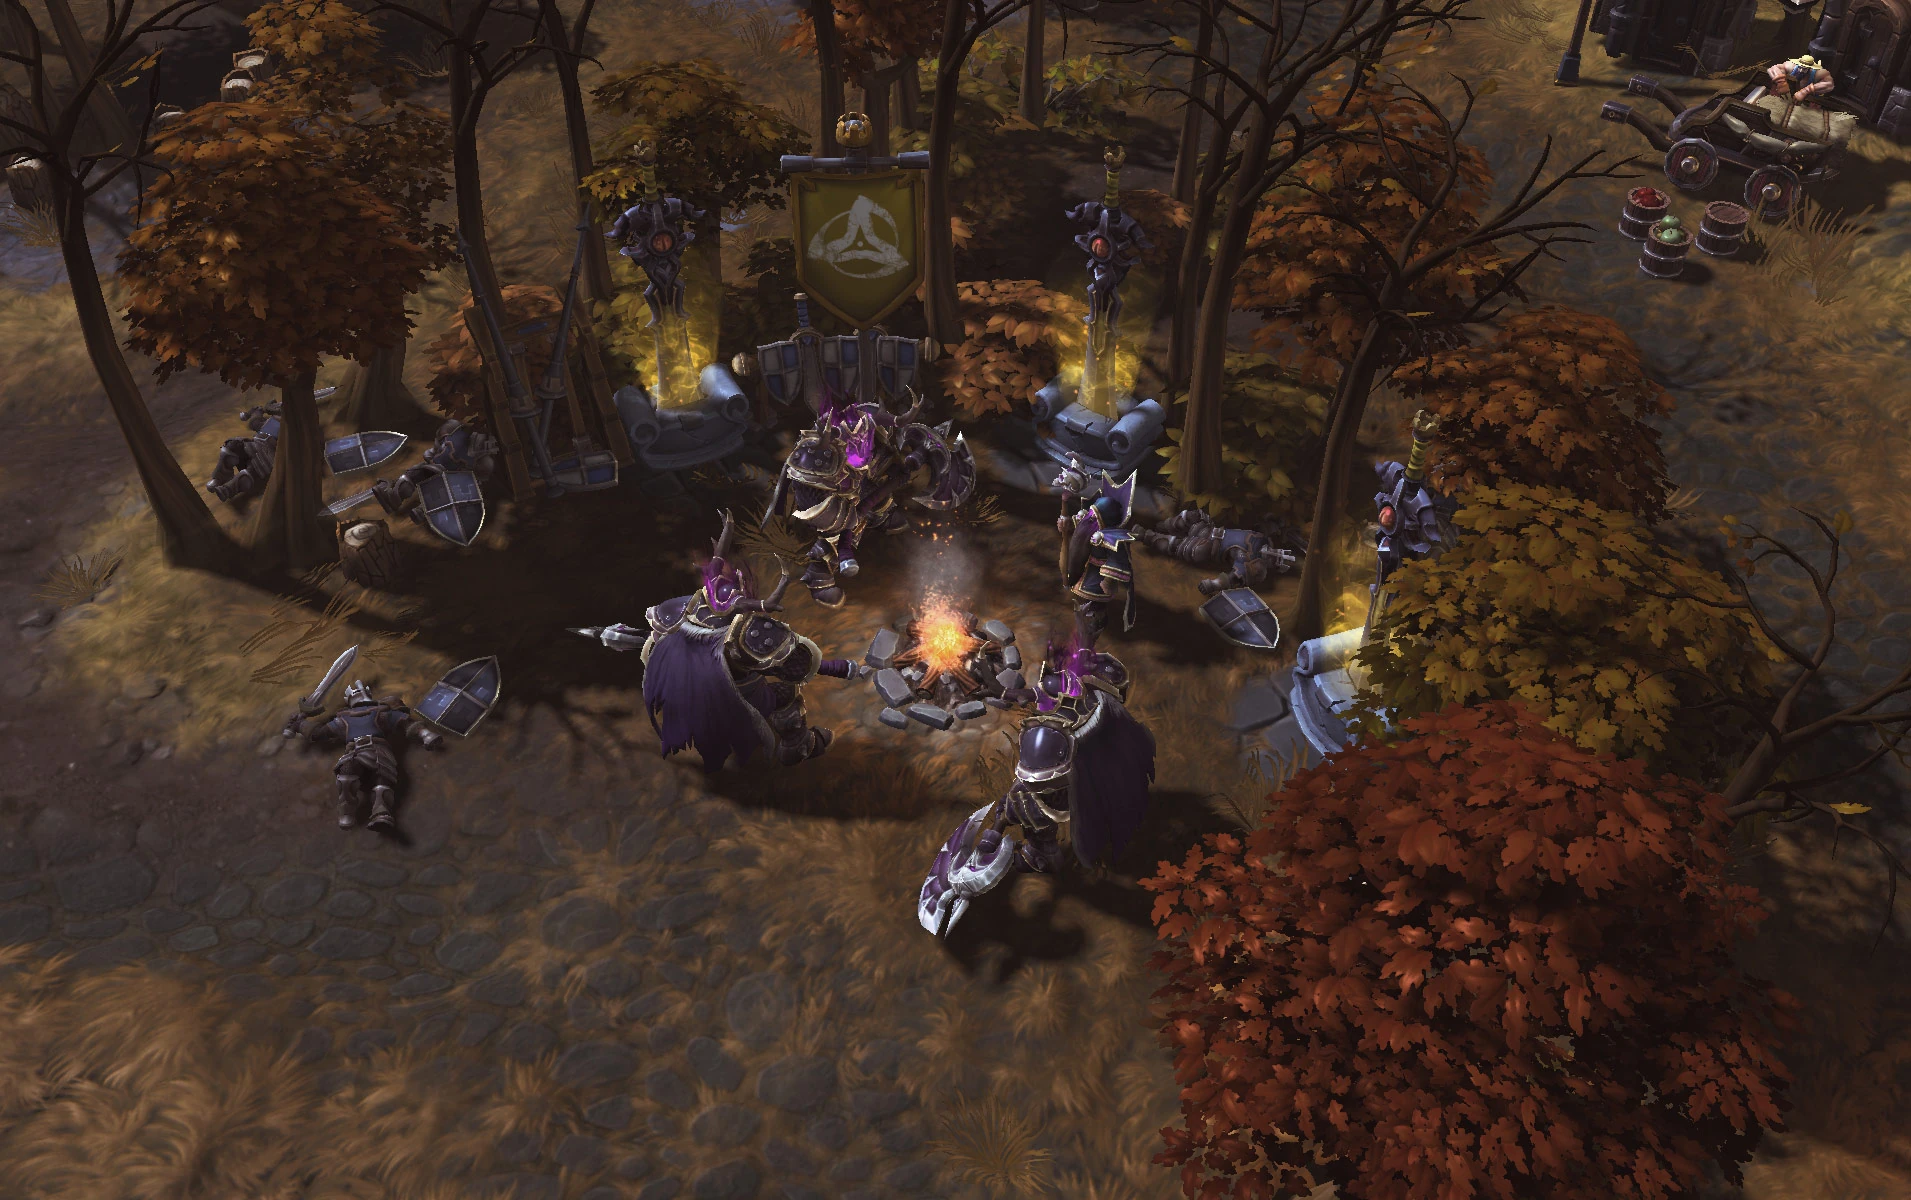
[[File:Heroes-04.jpg|thumb|A knight camp.]] |
[[File:Heroes-04.jpg|thumb|A knight camp.]] |
||
| − | In addition to the various [[ |
+ | In addition to the various [[Objective]]s each [[Battleground]] offers, you'll also be able to earn the allegiance of the '''Mercenaries''', who populate the world between lanes. Mercenaries, often simply referred as "Mercs", are neutral units that dwell in packs of 1-4 in spots called "camps" in various locations around both teams' [[jungle]]s. Each Battleground features different kinds of powerful Mercenaries that can be defeated for a sizable [[Experience]] reward and to recruit them to fight for you. |
| − | |||
| − | Mercenary camps spawn at various points during a match. Once a camp has been captured, a respawn timer will begin, at the completion of which the mercenaries will reappear, ready for capture once more. Mercenaries do grant a [[experience]] when they're captured by your team. |
||
==Concepts== |
==Concepts== |
||
| + | To gain their favor, you must first defeat the neutral Mercenaries at their camp site, and then stand on the beacon nearby to capture them for your team. When defeated, they grant Mercenaries that aid your team's [[Minion]] waves in attacking enemy Minions and [[Structure]]s as well as granting other helpful bonuses. Determining the optimal time to capture a Mercenary camp is crucial, and can be of great value when you need to distract the enemy team from capturing an objective. |
||
| − | Most Battlegrounds feature powerful, neutral creatures, known as Mercenaries. These Mercenaries can aid your team by advancing down the lanes and attacking minions and fortresses, and there are yet other kinds of helpful Mercenary Camps which offer different bonuses. |
||
| + | === Spawn === |
||
| ⚫ | |||
| + | Mercenaries generally first spawn at their camps at 1 minute mark, except for Bosses that first spawn at the 5 minute mark. After their spawn any player can attack the Mercenaries found there and try to defeat and capture them. Once a camp has been captured, a respawn timer will begin, at the completion of which the Mercenaries will reappear, ready for capture once more. The length of each camp's respawn timer depends on the type of Mercenary units located in the camp. |
||
| ⚫ | |||
| − | Mercenaries are not won by simply defeating the camp. You must stand uncontested for a few seconds on the beacon that spawns after clearing the neutral mercs. If you don’t, a keen opponent can steal the camp away from your team. |
||
| + | Mercenaries are not won over by simply defeating the camp. Each camp must be captured in order to recruit the Mercenaries found there. After defeating all Mercenaries in a camp, a capture point will appear. By standing on the capture point uncontested for 1.5 seconds, the player will gain control of the Mercenaries for their team, causing the Mercenaries to spring into action for the team and march down the nearest lane or grant a reward. Upon successfully capturing a Mercenary camp it will also drop a [[Regeneration Globe]] in the color of the team that captured it. |
||
| + | |||
| ⚫ | Note that either team may try to capture the capture point, even if the other team defeated the Mercenaries. Sometimes a player may wait just out of sight of an enemy player who is attempting to capture a Mercenary camp, and swoop in at the last second to kill the enemy player (who may be weakened from fighting the Mercenaries) and then capture the camp for their own team, or a decision can also be made as a team to invade a camp the enemy is doing in order to fight for it. Big team fights are often centered around trying to capture Mercenary camps, especially Bosses, for your team. |
||
| + | |||
| + | If both teams' Heroes are at the same time present on the capture point it will become "contested", and its capture timer is paused until there are only one team's Heroes in the area. Heroes that are [[untargetable]] or removed from the map, usually due to [[Stasis]] or [[Time Stop]] status effects, cannot capture or contest a camp. One should thus be careful with the use of defensive Abilities, like [[Auriel]]'s "Crystal Aegis" or [[Blaze]]'s "Bunker", as allies in them cannot contest a camp, which can in turn lead to it awkwardly falling into enemy hands. Used offensively on the other hand, Abilities, such as [[Medivh]]'s "Ley Line Seal", are for this reason strong tools for securing a camp. |
||
| + | |||
| ⚫ | |||
| ⚫ | All Mercenary Camps grant all [[Experience]] to the team that ''captured'' the camp, it does not matter who did damage or killed the camp.<ref>[http://heroesofthestorm.com/en-us/blog/22647956/heroes-of-the-storm-patch-notes-november-13-2018-2018-11-13/ Heroes of the Storm Patch Notes – November 13, 2018]</ref> |
||
| ⚫ | |||
| ⚫ | |||
| − | Each camp must be captured in order to recruit the mercenaries found there. This is achieved by defeating the mercenaries themselves. Once a camp has spawned, any player can attack the mercenaries found there, and if they successfully defeat them all, a capture point will appear. By standing on the capture point uncontested for .75 seconds, the player will gain control of the mercenaries for their team, at which point the mercenaries will run to the nearest lane and spring into action for the team. |
||
| + | === Leashed === |
||
| ⚫ | Note that either team may capture the capture point, even if the other team defeated the |
||
| + | Leashed is a status effect that uncaptured Mercenaries receive if they go far enough outside of their camp area that they are supposed to stay in or lose vision of all hostile units nearby. The effect causes the Mercenaries to ignore the player and return back to its camp and then shortly afterwards start to regenerate Health, this healing effect grows exponentially till the camp gets re-engaged again. If the Mercenary camp gets Leashed 3 times in a short amount of time, the units in it will immediately restore all missing Health, receive a Movement Speed buff to return to their camp much faster and gain damage immunity for a short amount of time. |
||
==Disappearance after objective activated== |
==Disappearance after objective activated== |
||
| − | On some maps, after the objective has been activated, |
+ | On some maps, after the objective has been activated, Mercenary camps would disappear, only reappearing after the objective has been neutralised. As the camp will not despawn if it is already engaged, teams can consider engaging camps just before the objective is activated. |
# [[Alterac Pass]]: Once the [[cavalry]] begin spawning. Camps reappear only after all cavalry have been killed. |
# [[Alterac Pass]]: Once the [[cavalry]] begin spawning. Camps reappear only after all cavalry have been killed. |
||
# [[Battlefield of Eternity]]: Once an [[Immortal]] has been activated. |
# [[Battlefield of Eternity]]: Once an [[Immortal]] has been activated. |
||
| Line 28: | Line 35: | ||
# [[Volskaya Foundry]]: Once the [[Triglav Protector]] has been spawned. |
# [[Volskaya Foundry]]: Once the [[Triglav Protector]] has been spawned. |
||
| + | Do keep in mind that if a camp was leashed from getting far away from it while the objective is active will cause it to disappear immediately, additionally any engaged Mercenary camp during an active objective will keep the camp marker on the map visible, causing your location to be revealed to the enemy. |
||
| − | ==Scaling== |
||
| ⚫ | |||
| + | ==Stats & scaling== |
||
| ⚫ | [[Mercenary Lord]] is a [[Generic Talent]] that both |
||
| ⚫ | Defending uncaptured Mercenaries have different statistics from the captured laning Mercenaries, with captured Mercenaries ''usually'' having more Health and damage than corresponding uncaptured ones. Uncaptured Mercenaries also increase their statistics every minute, in a linear ramping fashion. However, a Mercenary camp that has been aggroed will not update its statistics mid-fight, and only after resetting aggression on a Mercenary camp will it update its statistics to the current minute. Captured Mercenaries have their statistics snapshot when the capture beacon becomes available, so clearing a Mercenary camp then waiting on capturing the beacon will not yield additional statistics. |
||
| + | == Mercenary Lord == |
||
| ⚫ | |||
| + | [[File:Mercenary_Lord_Icon.png|thumb|Mercenary Lord icon.]] |
||
| ⚫ | All Mercenary Camps grant all Experience to the team that captured the camp, it does not matter who did damage or killed the camp.<ref>[http://heroesofthestorm.com/en-us/blog/22647956/heroes-of-the-storm-patch-notes-november-13-2018-2018-11-13/ Heroes of the Storm Patch Notes – November 13, 2018]</ref> |
||
| ⚫ | [[Mercenary Lord]] is a [[Generic Talent]] that both grants [[Armor]] against all Mercenaries and empowers nearby allied captured non-Boss Mercenaries. The damage reduction makes capturing Mercenaries significantly easier, especially hard-hitting Bosses that are also affected by the damage reduction. The damage bonus aura has medium radius, but can provide a huge boost in pushing power and presence. It is shown by the Mercenaries growing slightly larger in size. |
||
| − | |||
| ⚫ | |||
==When Should I Be Doing Camps?== |
==When Should I Be Doing Camps?== |
||
| − | + | While Mercenaries can be a great asset, you should never take any camp without having a reason for doing so. One should consider, how safe it is to take a certain camp, if there are demerits in leaving your lane to do Mercenaries and how much value can be gained from those Mercenaries. |
|
| + | |||
| + | Obviously, it’s less risky to take camps on your side of the map (safe camps) than it is on your opponent’s side (not-safe camps). Sneaking enemy camps almost always ends in tragedy, so it’s in your best interest to refrain unless your team is on the same page. |
||
| + | |||
| ⚫ | Before level 10 you should not be doing camps, if you do not have a member of the team [[soak]]ing in every lane. Having a Hero in each lane for every waking moment of the laning phase is very important, as you want to capture as much experience as possible on the battleground as fast as possible to get ahead of the enemy team. |
||
| + | |||
| ⚫ | Throughout the game Mercenaries can help sow confusion for the opponent when [[Objective]]s become available. Timing a Mercenary assault during an Objective will give pause to enemies, who will then need to choose between clearing the incoming Mercenaries, or contesting the Objective. Additionally, splitting the opponents’ defenses can help in a big push against opposing fortifications, as well as give your team more vision, and more control over the map.<ref>[http://heroesofthestorm.com/blog/20720248#Mapadvantage Core Concepts: Battleground Basics - Mercenaries]. ''Battle.net''. Retrieved on 2017-05-23.</ref> |
||
Ask yourself this series of questions every time you consider taking a camp: |
Ask yourself this series of questions every time you consider taking a camp: |
||
| Line 49: | Line 61: | ||
*Which enemy Hero am I anticipating will come to clear this camp? |
*Which enemy Hero am I anticipating will come to clear this camp? |
||
*Will this camp be forcing the enemies to miss a portion of an objective? |
*Will this camp be forcing the enemies to miss a portion of an objective? |
||
| − | |||
| ⚫ | Before level 10 you should not be doing camps if you do not have a member of the team [[soak]]ing in every lane. |
||
==Types== |
==Types== |
||
| − | There are several types of |
+ | There are several types of Mercenary camps, some only found on certain themed [[battleground]]s. Each is displayed with its own difficult rating, indicating the challenge of defeating the Mercenaries found there. Some camps share similarities which give them an over-arching type, such as Siege camp, Bruiser camp, and Boss camp. |
===Siege Camps=== |
===Siege Camps=== |
||
| − | Siege |
+ | Siege Mercenaries are destructive Mercenaries that are weak if attacked by heroes and are the easiest camps to take, but if left alone in a lane they can clear waves and sometimes take structures. |
{|class='wikitable' width='100%' |
{|class='wikitable' width='100%' |
||
! Name || Properties || Description !! Battleground || Spawn || Respawn |
! Name || Properties || Description !! Battleground || Spawn || Respawn |
||
|- |
|- |
||
| − | | |
+ | |{{Merc tile|Armored Gnoll}} || Splash Damage, Tanky & Armor reduction|| The Armored Gnolls spawn as three and can soak up damage from towers and enemy minions. Enemies hit by their basic attacks will have their armor reduced for a few seconds.|| [[Alterac Pass]] || 1:00 || 1:30 |
|- |
|- |
||
| − | | |
+ | |{{Merc tile|Assault Trooper}} || Medium damage & Long Range || These camps consist of three men piloting hovering exoskeletons with long-ranged missile attacks that outrange structures. || [[Volskaya Foundry]] || 1:00 || 3:00 |
|- |
|- |
||
| − | | |
+ | |{{Merc tile|Hellbat}} ||Splash Damage, Tanky & Armor reduction|| The Hellbats spawn in duos and can soak up damage from towers and enemy minions. Enemies hit by their basic attacks will have their armor reduced for a few seconds. || [[Braxis Holdout]], [[Warhead Junction]]. || 1:00 || 3:00 |
|- |
|- |
||
| − | | |
+ | |{{Merc tile|Impaler}} || Medium damage & Long Range || Aka Khazra camps, these goatmen spawn in trios and are able to attack structures outside of their attack ranges. || [[Battlefield of Eternity]], [[Infernal Shrines]] || 1:00 || 3:00 |
|- |
|- |
||
| − | | |
+ | |{{Merc tile|Sapper}} || Medium damage, Medium Range Siege Attack & Suicide Bomb Structures || Spawning in groups of 3, these pumpkins have a ranged attack like with splash damage. When it is close enough to a enemy structure it will charge in and suicide to blow up the fortification.|| [[Towers of Doom]], [[Haunted Mines]] || 1:00 || 2:00 (2:30 on Towers of Doom) |
|- |
|- |
||
| − | | |
+ | |{{Merc tile|Sentinel}} || Heavy Damage, Tanky & AoE Ability || Sentinels push down lanes and have a strong AoE Ability. Sentinels are [[Unstoppable]] and [[Unbribable]].|| [[Hanamura Temple]] || 1:00 || 2:30 |
|- |
|- |
||
| − | | |
+ | |{{Merc tile|Siege giant}} || Heavy Damage & Long Range Siege Attack|| Siege giants are found in groups of 2 and can easily take down enemy [[fort]]s from outside the structures' attack ranges. However, they are not as threatening up close, which makes them fairly easy for enemy heroes to defeat once in action. || [[Dragon Shire]], [[Cursed Hollow]], [[Garden of Terror]], [[Haunted Mines]], [[Blackheart's Bay]], [[Sky Temple]], [[Tomb of the Spider Queen]] || 1:00 || 3:00 |
|- |
|- |
||
|} |
|} |
||
| Line 83: | Line 93: | ||
! Name || Properties || Description !! Battleground || Spawn || Respawn |
! Name || Properties || Description !! Battleground || Spawn || Respawn |
||
|- |
|- |
||
| − | | |
+ | |{{Merc tile|Knight}} ||Tanky, ranged, and [[Spell Armor]] aura|| Knights are 4 tanky units that are excellent at fortifying [[minion]] waves. They are found in groups with 3 frontliners and a single ranged "Wizard", who emits a [[spell armor]] aura to buff all nearby allied units, including Heroes.|| [[Dragon Shire]], [[Cursed Hollow]], [[Garden of Terror]], [[Blackheart's Bay]], [[Sky Temple]], [[Tomb of the Spider Queen]] || 1:00 || 4:00 |
|- |
|- |
||
| − | | |
+ | |{{Merc tile|Fallen Shaman}} || High damage ranged attack & Summons dogs periodically || The Fallen Shaman camp is made up of the Shaman himself with ranged attacks, and 2 melee dogs. When captured the Shaman will resummon his dogs when they die to help him, be it with significantly less health. Shaman and dogs deal 100% more damage to [[Minion]]s, [[Structure]]s and [[Summon]]s. ||[[Battlefield of Eternity]], [[Infernal Shrines]] || 1:00 || 4:00 |
|- |
|- |
||
| − | | |
+ | |{{Merc tile|Raven}} || Tanky, ranged, and Seeker Missiles || This camp consists of 3 Goliaths & 1 Raven. The Goliaths have a fast ranged attack, but do not out range the structures' attacks. The raven however, does out range structures as well as periodically sends Seeker Missiles to its current target dealing AoE damage. || [[Braxis Holdout]], [[Warhead Junction]] || 1:00 || 4:00 |
|- |
|- |
||
|} |
|} |
||
===Boss Camps=== |
===Boss Camps=== |
||
| − | These are the biggest, baddest |
+ | These are the biggest, baddest Mercenaries you can capture. They reside in most, but not all Battlegrounds. There is only one Boss per camp, but that one Boss does a lot of damage with each swing while also possessing a huge amount of Health and crowd control and Aoe Abilities. Combined, it makes them tough to defeat and usually requires multiple Heroes to take them down. Even as a group, picking a fight with them takes a lot of resources, making you vulnerable to ambushes. As it can turn out very badly for the team that initiated a Boss, their spawn location has widely become known as "the throw pit", for turning an otherwise advantageous situation on their head. It is thus recommended to only attack them when you have a definite level, Talent or map advantage or some opposing Heroes are dead in order to make sure it will not be stolen from you. |
| + | |||
| + | Once captured, Bosses march down the nearest lane as other Mercenaries, auto-attacking Structures, with the addition to often being able to use their Abilities on enemy Minions and Heroes (Archangel besides using Abilities on Minions and Heroes, uses auto-attack on Minions too). If left unchecked, a Boss can literally break down Walls and Towers - even a Keep - almost all by itself. Late game Boss pushes are often game-ending. |
||
| + | |||
| + | Unlike other Mercenaries, captured Bosses cannot have [[buff]] Abilities be cast on them. Also, as Elite Mercenaries they cannot be [[Bribe]]d and are [[Unstoppable]], making them immune to [[crowd control]]. |
||
{|class='wikitable' width='100%' |
{|class='wikitable' width='100%' |
||
! Name || Properties || Description !! Battleground || Spawn || Respawn |
! Name || Properties || Description !! Battleground || Spawn || Respawn |
||
|- |
|- |
||
| − | | |
+ | |{{Merc tile|Archangel}} || Massive Damage, ranged & very Tanky || The Archangel fires an extremely high-damage stream of bullets at the closest enemy making and can fires a rocket dealing damage. The raw damage it deals is offset by it having less health that other bosses. || [[Braxis Holdout]] || 5:00 || 4:10 |
|- |
|- |
||
| − | | |
+ | |{{Merc tile|Grave Golem}} || Massive Damage, CC, & extremely Tanky || Grave Golems are large, tanky, high damage bosses that can easily push through enemy creeps and forts. They will alternate between a delayed slam on the ground dealing high damage and stunning, and a delayed root and DoT in a ranged AoE. || [[Cursed Hollow]], [[Blackheart's Bay]] || 5:00 || 5:00 |
|- |
|- |
||
| − | | |
+ | |{{Merc tile|Headless Horseman}} || Cleaving attacks, high-scaling AoE damage and very Tanky || The Headless Horseman is a high-damage boss with attacks that cleave. He also launches his head at enemies leaving a DoT field below them. This is offset by him having slightly lower health that other bosses, but his arena is very out in the open. When defeated, instead of pushing the nearest lane, he unleashes a volley of flaming pumpkins that deals 4 damage to the enemy team's core. || [[Towers of Doom]] || 5:00 || 5:00 |
|- |
|- |
||
| − | | |
+ | |{{Merc tile|Ice Giant}} || Massive Damage, CC, and extremely Tanky || The Ice Giants at the northern and southernmost points of [[Alterac Pass]] tend to mind their own business, but once provoked, they’ve been known to hurl deadly balls of ice and even stomp the ground in an effort to Slow or Stun their foes. || [[Alterac Pass]] || 5:00 || 5:00 |
|- |
|- |
||
|[[File:Targetinfopanel unit hanamura boss.png|61px|link=Mega Enforcer]] [[Mega Enforcer]] || Massive Damage, Gorge, and very Tanky || This Boss gorges a hero for 5 seconds with a 12-second cooldown, preventing them from taking any action. After gorging, the Boss creates a ring of fire that does periodic damage. When defeated, instead of pushing the nearest lane, the Mega Enforcer deals 1 damage to the enemy team's Core. || [[Hanamura (original)|Hanamura]] (removed) || 5:00 || 5:00 |
|[[File:Targetinfopanel unit hanamura boss.png|61px|link=Mega Enforcer]] [[Mega Enforcer]] || Massive Damage, Gorge, and very Tanky || This Boss gorges a hero for 5 seconds with a 12-second cooldown, preventing them from taking any action. After gorging, the Boss creates a ring of fire that does periodic damage. When defeated, instead of pushing the nearest lane, the Mega Enforcer deals 1 damage to the enemy team's Core. || [[Hanamura (original)|Hanamura]] (removed) || 5:00 || 5:00 |
||
|- |
|- |
||
| − | | |
+ | |{{Merc tile|Sand Golem}} || Massive Damage, CC, and extremely Tanky ||The Sand Golem is similar to the Grave Golem, with lots of health and high damage and even a delayed stun. It also periodically spawns a whirlwind that moves around randomly damaging and pushing heroes out of the way/prevents them from walking through that area. || [[Sky Temple]], [[Tomb of the Spider Queen]] || 5:00 || 5:00 |
|- |
|- |
||
| − | | |
+ | |{{Merc tile|Slime Boss}} || AOE, DoT, and very Tanky || The Slime Boss fires ''Slime Pods'' dealing damage over time. || [[Warhead Junction]] || 5:00 || 5:00 |
|- |
|- |
||
|} |
|} |
||
| Line 119: | Line 133: | ||
! Name || Description || Reward !! Battleground || Spawn || Respawn |
! Name || Description || Reward !! Battleground || Spawn || Respawn |
||
|- |
|- |
||
| − | | |
+ | |{{Merc tile|Fortification Camp}} || Consists of a mechanic and a stationary turret. The mechanic can heal the turret. The turret is [[Unstoppable]].|| Creates a Turret on the ground, which fires at enemies. || [[Hanamura Temple]], [[Volskaya Foundry]] || 1:00 || 2:30 |
|- |
|- |
||
| − | | |
+ | |{{Merc tile|Recon Camp}} || Consists of 3 Henchmen. The Henchmen deal little damage and are easy to kill. || Recon Camps offer the vision that [[Watchtower]]s do on the other maps. However, taking the camp means your enemies can re-take it to provide vision for their own team. || [[Hanamura Temple]] || 1:00 || Immediately |
|- |
|- |
||
| − | | |
+ | |{{Merc tile|Skeletal Pirate}} || Skeletal pirates are very easily captured.|| Grant 2 [[Doubloon]]s || [[Blackheart's Bay]] || 1:30 || 2:30 |
|- |
|- |
||
| − | | |
+ | |{{Merc tile|Support Camp}} || Consists of 1 mech. The mech occasionally heals itself. || Support Camps give you a healing totem that restores 40% maximum Health and Mana to nearby allied Heroes over 10 seconds. Support Camps cannot be captured by using abilities like "[[Bribe]]" and are [[Unstoppable]]. || [[Hanamura (original)|Hanamura]] (removed), [[Volskaya Foundry]] || 1:00 || 3:00 |
|- |
|- |
||
|} |
|} |
||
| + | |||
| + | === Elite Mercenaries === |
||
| + | Elite Mercenaries is a special subgroup of Mercenary units. These Mercenaries are permanently [[Unstoppable]] and cannot be [[Bribe]]d. Following units count as Elite Mercenaries: |
||
| + | |||
| + | * All [[Mercenary camp#Boss Camps|Bosses]] |
||
| + | * [[Sentinel]] on [[Hanamura Temple]] |
||
| + | * [[Support Camp]] on [[Volskaya Foundry]] |
||
==References== |
==References== |
||
Revision as of 18:28, 28 September 2021
A knight camp.
In addition to the various Objectives each Battleground offers, you'll also be able to earn the allegiance of the Mercenaries, who populate the world between lanes. Mercenaries, often simply referred as "Mercs", are neutral units that dwell in packs of 1-4 in spots called "camps" in various locations around both teams' jungles. Each Battleground features different kinds of powerful Mercenaries that can be defeated for a sizable Experience reward and to recruit them to fight for you.
Concepts
To gain their favor, you must first defeat the neutral Mercenaries at their camp site, and then stand on the beacon nearby to capture them for your team. When defeated, they grant Mercenaries that aid your team's Minion waves in attacking enemy Minions and Structures as well as granting other helpful bonuses. Determining the optimal time to capture a Mercenary camp is crucial, and can be of great value when you need to distract the enemy team from capturing an objective.
Spawn
Mercenaries generally first spawn at their camps at 1 minute mark, except for Bosses that first spawn at the 5 minute mark. After their spawn any player can attack the Mercenaries found there and try to defeat and capture them. Once a camp has been captured, a respawn timer will begin, at the completion of which the Mercenaries will reappear, ready for capture once more. The length of each camp's respawn timer depends on the type of Mercenary units located in the camp.
Capturing & contesting
Mercenaries are not won over by simply defeating the camp. Each camp must be captured in order to recruit the Mercenaries found there. After defeating all Mercenaries in a camp, a capture point will appear. By standing on the capture point uncontested for 1.5 seconds, the player will gain control of the Mercenaries for their team, causing the Mercenaries to spring into action for the team and march down the nearest lane or grant a reward. Upon successfully capturing a Mercenary camp it will also drop a Regeneration Globe in the color of the team that captured it.
Note that either team may try to capture the capture point, even if the other team defeated the Mercenaries. Sometimes a player may wait just out of sight of an enemy player who is attempting to capture a Mercenary camp, and swoop in at the last second to kill the enemy player (who may be weakened from fighting the Mercenaries) and then capture the camp for their own team, or a decision can also be made as a team to invade a camp the enemy is doing in order to fight for it. Big team fights are often centered around trying to capture Mercenary camps, especially Bosses, for your team.
If both teams' Heroes are at the same time present on the capture point it will become "contested", and its capture timer is paused until there are only one team's Heroes in the area. Heroes that are untargetable or removed from the map, usually due to Stasis or Time Stop status effects, cannot capture or contest a camp. One should thus be careful with the use of defensive Abilities, like Auriel's "Crystal Aegis" or Blaze's "Bunker", as allies in them cannot contest a camp, which can in turn lead to it awkwardly falling into enemy hands. Used offensively on the other hand, Abilities, such as Medivh's "Ley Line Seal", are for this reason strong tools for securing a camp.
Experience
All Mercenary Camps grant all Experience to the team that captured the camp, it does not matter who did damage or killed the camp.[1]
Captured Mercenary camps do not grant experience to the opponent when killed.
Leashed
Leashed is a status effect that uncaptured Mercenaries receive if they go far enough outside of their camp area that they are supposed to stay in or lose vision of all hostile units nearby. The effect causes the Mercenaries to ignore the player and return back to its camp and then shortly afterwards start to regenerate Health, this healing effect grows exponentially till the camp gets re-engaged again. If the Mercenary camp gets Leashed 3 times in a short amount of time, the units in it will immediately restore all missing Health, receive a Movement Speed buff to return to their camp much faster and gain damage immunity for a short amount of time.
Disappearance after objective activated
On some maps, after the objective has been activated, Mercenary camps would disappear, only reappearing after the objective has been neutralised. As the camp will not despawn if it is already engaged, teams can consider engaging camps just before the objective is activated.
- Alterac Pass: Once the cavalry begin spawning. Camps reappear only after all cavalry have been killed.
- Battlefield of Eternity: Once an Immortal has been activated.
- Braxis Holdout: Once the Zerg Waves spawn. Camps reappear only after all Zerg in both waves have been killed.
- Dragon Shire: Once the Dragon Knight has been activated.
- Garden of Terror: Once the Garden Terrors have been activated. Camps reappear only after all Garden Terrors have been killed.
- Tomb of the Spider Queen: Once the webweavers begin spawning. Camps reappear only after all webweavers have been killed.
- Volskaya Foundry: Once the Triglav Protector has been spawned.
Do keep in mind that if a camp was leashed from getting far away from it while the objective is active will cause it to disappear immediately, additionally any engaged Mercenary camp during an active objective will keep the camp marker on the map visible, causing your location to be revealed to the enemy.
Stats & scaling
Defending uncaptured Mercenaries have different statistics from the captured laning Mercenaries, with captured Mercenaries usually having more Health and damage than corresponding uncaptured ones. Uncaptured Mercenaries also increase their statistics every minute, in a linear ramping fashion. However, a Mercenary camp that has been aggroed will not update its statistics mid-fight, and only after resetting aggression on a Mercenary camp will it update its statistics to the current minute. Captured Mercenaries have their statistics snapshot when the capture beacon becomes available, so clearing a Mercenary camp then waiting on capturing the beacon will not yield additional statistics.
Mercenary Lord
Mercenary Lord icon.
Mercenary Lord is a Generic Talent that both grants Armor against all Mercenaries and empowers nearby allied captured non-Boss Mercenaries. The damage reduction makes capturing Mercenaries significantly easier, especially hard-hitting Bosses that are also affected by the damage reduction. The damage bonus aura has medium radius, but can provide a huge boost in pushing power and presence. It is shown by the Mercenaries growing slightly larger in size.
When Should I Be Doing Camps?
While Mercenaries can be a great asset, you should never take any camp without having a reason for doing so. One should consider, how safe it is to take a certain camp, if there are demerits in leaving your lane to do Mercenaries and how much value can be gained from those Mercenaries.
Obviously, it’s less risky to take camps on your side of the map (safe camps) than it is on your opponent’s side (not-safe camps). Sneaking enemy camps almost always ends in tragedy, so it’s in your best interest to refrain unless your team is on the same page.
Before level 10 you should not be doing camps, if you do not have a member of the team soaking in every lane. Having a Hero in each lane for every waking moment of the laning phase is very important, as you want to capture as much experience as possible on the battleground as fast as possible to get ahead of the enemy team.
Throughout the game Mercenaries can help sow confusion for the opponent when Objectives become available. Timing a Mercenary assault during an Objective will give pause to enemies, who will then need to choose between clearing the incoming Mercenaries, or contesting the Objective. Additionally, splitting the opponents’ defenses can help in a big push against opposing fortifications, as well as give your team more vision, and more control over the map.[2]
Ask yourself this series of questions every time you consider taking a camp:
- Does my team need me elsewhere?
- Are we going to be able to push with this camp?
- If I start this camp, am I in danger of being invaded by the enemy?
- Do I need help to do this camp quickly?
- Which enemy Hero am I anticipating will come to clear this camp?
- Will this camp be forcing the enemies to miss a portion of an objective?
Types
There are several types of Mercenary camps, some only found on certain themed battlegrounds. Each is displayed with its own difficult rating, indicating the challenge of defeating the Mercenaries found there. Some camps share similarities which give them an over-arching type, such as Siege camp, Bruiser camp, and Boss camp.
Siege Camps
Siege Mercenaries are destructive Mercenaries that are weak if attacked by heroes and are the easiest camps to take, but if left alone in a lane they can clear waves and sometimes take structures.
| Name | Properties | Description | Battleground | Spawn | Respawn |
|---|---|---|---|---|---|
| Splash Damage, Tanky & Armor reduction | The Armored Gnolls spawn as three and can soak up damage from towers and enemy minions. Enemies hit by their basic attacks will have their armor reduced for a few seconds. | Alterac Pass | 1:00 | 1:30 | |
| Medium damage & Long Range | These camps consist of three men piloting hovering exoskeletons with long-ranged missile attacks that outrange structures. | Volskaya Foundry | 1:00 | 3:00 | |
| Splash Damage, Tanky & Armor reduction | The Hellbats spawn in duos and can soak up damage from towers and enemy minions. Enemies hit by their basic attacks will have their armor reduced for a few seconds. | Braxis Holdout, Warhead Junction. | 1:00 | 3:00 | |
| Medium damage & Long Range | Aka Khazra camps, these goatmen spawn in trios and are able to attack structures outside of their attack ranges. | Battlefield of Eternity, Infernal Shrines | 1:00 | 3:00 | |
| Medium damage, Medium Range Siege Attack & Suicide Bomb Structures | Spawning in groups of 3, these pumpkins have a ranged attack like with splash damage. When it is close enough to a enemy structure it will charge in and suicide to blow up the fortification. | Towers of Doom, Haunted Mines | 1:00 | 2:00 (2:30 on Towers of Doom) | |
| Heavy Damage, Tanky & AoE Ability | Sentinels push down lanes and have a strong AoE Ability. Sentinels are Unstoppable and Unbribable. | Hanamura Temple | 1:00 | 2:30 | |
| Heavy Damage & Long Range Siege Attack | Siege giants are found in groups of 2 and can easily take down enemy forts from outside the structures' attack ranges. However, they are not as threatening up close, which makes them fairly easy for enemy heroes to defeat once in action. | Dragon Shire, Cursed Hollow, Garden of Terror, Haunted Mines, Blackheart's Bay, Sky Temple, Tomb of the Spider Queen | 1:00 | 3:00 |
Bruiser Camps
Bruiser are tanky units that take longer to capture but are excellent at fortifying creep waves, making them a strong addition to any push or a distraction for enemies to waste time on.
| Name | Properties | Description | Battleground | Spawn | Respawn |
|---|---|---|---|---|---|
| Tanky, ranged, and Spell Armor aura | Knights are 4 tanky units that are excellent at fortifying minion waves. They are found in groups with 3 frontliners and a single ranged "Wizard", who emits a spell armor aura to buff all nearby allied units, including Heroes. | Dragon Shire, Cursed Hollow, Garden of Terror, Blackheart's Bay, Sky Temple, Tomb of the Spider Queen | 1:00 | 4:00 | |
| High damage ranged attack & Summons dogs periodically | The Fallen Shaman camp is made up of the Shaman himself with ranged attacks, and 2 melee dogs. When captured the Shaman will resummon his dogs when they die to help him, be it with significantly less health. Shaman and dogs deal 100% more damage to Minions, Structures and Summons. | Battlefield of Eternity, Infernal Shrines | 1:00 | 4:00 | |
| Tanky, ranged, and Seeker Missiles | This camp consists of 3 Goliaths & 1 Raven. The Goliaths have a fast ranged attack, but do not out range the structures' attacks. The raven however, does out range structures as well as periodically sends Seeker Missiles to its current target dealing AoE damage. | Braxis Holdout, Warhead Junction | 1:00 | 4:00 |
Boss Camps
These are the biggest, baddest Mercenaries you can capture. They reside in most, but not all Battlegrounds. There is only one Boss per camp, but that one Boss does a lot of damage with each swing while also possessing a huge amount of Health and crowd control and Aoe Abilities. Combined, it makes them tough to defeat and usually requires multiple Heroes to take them down. Even as a group, picking a fight with them takes a lot of resources, making you vulnerable to ambushes. As it can turn out very badly for the team that initiated a Boss, their spawn location has widely become known as "the throw pit", for turning an otherwise advantageous situation on their head. It is thus recommended to only attack them when you have a definite level, Talent or map advantage or some opposing Heroes are dead in order to make sure it will not be stolen from you.
Once captured, Bosses march down the nearest lane as other Mercenaries, auto-attacking Structures, with the addition to often being able to use their Abilities on enemy Minions and Heroes (Archangel besides using Abilities on Minions and Heroes, uses auto-attack on Minions too). If left unchecked, a Boss can literally break down Walls and Towers - even a Keep - almost all by itself. Late game Boss pushes are often game-ending.
Unlike other Mercenaries, captured Bosses cannot have buff Abilities be cast on them. Also, as Elite Mercenaries they cannot be Bribed and are Unstoppable, making them immune to crowd control.
| Name | Properties | Description | Battleground | Spawn | Respawn |
|---|---|---|---|---|---|
| Massive Damage, ranged & very Tanky | The Archangel fires an extremely high-damage stream of bullets at the closest enemy making and can fires a rocket dealing damage. The raw damage it deals is offset by it having less health that other bosses. | Braxis Holdout | 5:00 | 4:10 | |
| Massive Damage, CC, & extremely Tanky | Grave Golems are large, tanky, high damage bosses that can easily push through enemy creeps and forts. They will alternate between a delayed slam on the ground dealing high damage and stunning, and a delayed root and DoT in a ranged AoE. | Cursed Hollow, Blackheart's Bay | 5:00 | 5:00 | |
| Cleaving attacks, high-scaling AoE damage and very Tanky | The Headless Horseman is a high-damage boss with attacks that cleave. He also launches his head at enemies leaving a DoT field below them. This is offset by him having slightly lower health that other bosses, but his arena is very out in the open. When defeated, instead of pushing the nearest lane, he unleashes a volley of flaming pumpkins that deals 4 damage to the enemy team's core. | Towers of Doom | 5:00 | 5:00 | |
| Massive Damage, CC, and extremely Tanky | The Ice Giants at the northern and southernmost points of Alterac Pass tend to mind their own business, but once provoked, they’ve been known to hurl deadly balls of ice and even stomp the ground in an effort to Slow or Stun their foes. | Alterac Pass | 5:00 | 5:00 | |
| Massive Damage, Gorge, and very Tanky | This Boss gorges a hero for 5 seconds with a 12-second cooldown, preventing them from taking any action. After gorging, the Boss creates a ring of fire that does periodic damage. When defeated, instead of pushing the nearest lane, the Mega Enforcer deals 1 damage to the enemy team's Core. | Hanamura (removed) | 5:00 | 5:00 | |
| Massive Damage, CC, and extremely Tanky | The Sand Golem is similar to the Grave Golem, with lots of health and high damage and even a delayed stun. It also periodically spawns a whirlwind that moves around randomly damaging and pushing heroes out of the way/prevents them from walking through that area. | Sky Temple, Tomb of the Spider Queen | 5:00 | 5:00 | |
| AOE, DoT, and very Tanky | The Slime Boss fires Slime Pods dealing damage over time. | Warhead Junction | 5:00 | 5:00 |
Reward Camps
When a Reward Camp is captured, an item is dropped, which can be picked up and used by a hero. In addition, a large amount of experience is awarded to the team.
| Name | Description | Reward | Battleground | Spawn | Respawn |
|---|---|---|---|---|---|
| Consists of a mechanic and a stationary turret. The mechanic can heal the turret. The turret is Unstoppable. | Creates a Turret on the ground, which fires at enemies. | Hanamura Temple, Volskaya Foundry | 1:00 | 2:30 | |
| Consists of 3 Henchmen. The Henchmen deal little damage and are easy to kill. | Recon Camps offer the vision that Watchtowers do on the other maps. However, taking the camp means your enemies can re-take it to provide vision for their own team. | Hanamura Temple | 1:00 | Immediately | |
| Skeletal pirates are very easily captured. | Grant 2 Doubloons | Blackheart's Bay | 1:30 | 2:30 | |
| Consists of 1 mech. The mech occasionally heals itself. | Support Camps give you a healing totem that restores 40% maximum Health and Mana to nearby allied Heroes over 10 seconds. Support Camps cannot be captured by using abilities like "Bribe" and are Unstoppable. | Hanamura (removed), Volskaya Foundry | 1:00 | 3:00 |
Elite Mercenaries
Elite Mercenaries is a special subgroup of Mercenary units. These Mercenaries are permanently Unstoppable and cannot be Bribed. Following units count as Elite Mercenaries:
References
- ↑ Heroes of the Storm Patch Notes – November 13, 2018
- ↑ Core Concepts: Battleground Basics - Mercenaries. Battle.net. Retrieved on 2017-05-23.